
In order to use Custom Logging (Remote Syslog), your server requires a valid, non-self-signed certificate for encrypted connections. Self-signed certificates are not supported and may result in connection failures.
With the release of our Splunk logging integration, we have renamed the Remote Syslog Feed feature in the menu to SIEM logging integrations, and this now includes both the Splunk and Custom logging (remote syslog) sections.
Any Remote Syslog feeds created before the introduction of the Custom logging section will continue to work without any adjustment.
A syslog service is a standard service used to store and access logging data; many integrated logging solutions, including hosted or local rsyslog service or servers, provide the ability to receive data via a syslog feed.
When this functionality is enabled for a user, a log entry will be sent to the configured remote syslog server when a message is received, when a message delivery is attempted, and when a user marks a message as requiring training. You can configure the format of the log entry that is sent (both what data is included, and the layout) so that it meets the needs of your system.
Each user (at domain or admin level) may configure a single remote syslog feed, which will be appropriately restricted to events for that user.
How to configure
You can find this page under Reporting > SIEM logging integrations when logged in at all admin levels, and at domain level.
- Login to Spam Experts as an Admin Level user or as a Domain Level user
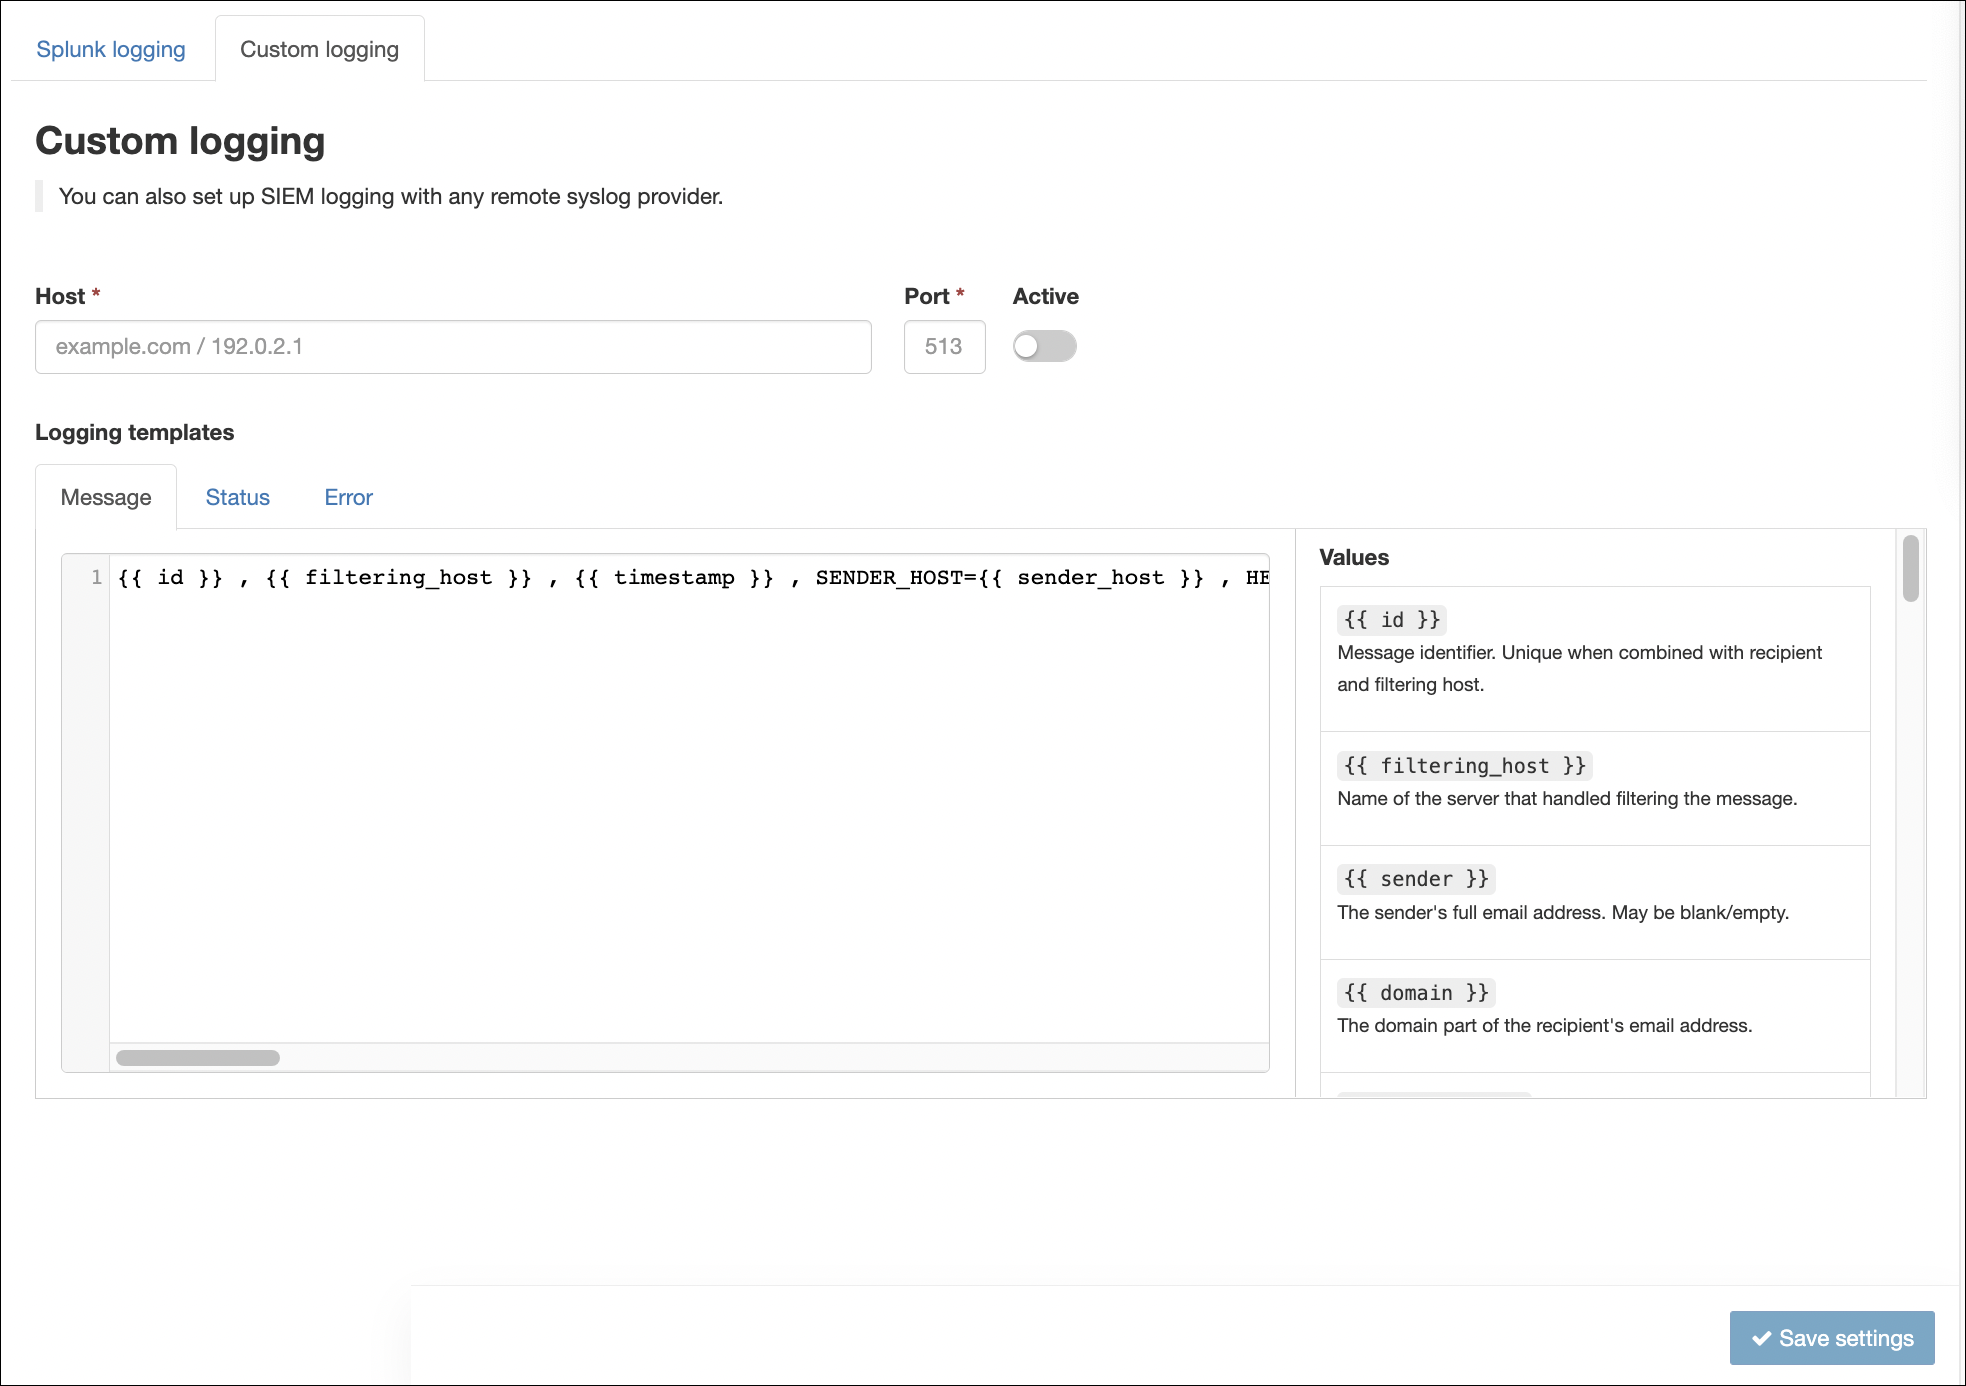
- Select Custom logging
- Click the Active toggle to enable Custom Logging
- Enter the following information:
- Hostname / IP
- Port
- Enter the Message, Status and Error templates required in the given boxes
- Click Save settings
Templates are pre-populated with our recommended values and keywords. Customize your templates by using values from the Values list. We recommend adding keywords before values to make the data more easily readable. For example keyword:{{value}}
Data from the Message template is sent when the message is processed. Please be aware that if you leave this template blank, you will not receive the Status template.